The Blog
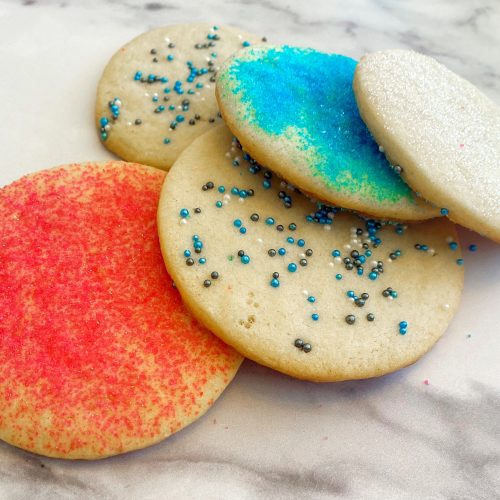
Painted Cookies
This is cookie-making and an art project all in one!
Print off coloring pages from your computer.

Make your cookie dough…..recipe BELOW.
I like to cut out parchment paper squares and roll out dough on top…..you don’t have to worry about transferring the cookie.


After the cookie is cut out, use a toothpick or small knife and draw the basic lines into the cookie.
DON’T STRESS ABOUT THIS! It doesn’t have to be perfect! Just do your best to copy the picture enough to paint it.
**Drawing the painting lines onto the cookie dough also prevents the egg paint from mixing together and allows you to paint with a clean line.


MAKE YOUR PAINT.
Break 2 or 3 egg yolks into a bowl. Add up to 1T of water, whipping with a fork until it makes a good consistency for painting. You can always add a little paint later if it feels too thick.

Spoon yolk mixture into small bowls. Here I am using a deviled egg tray. Start with one drop of food color into each bowl. I just use the basic food colorings from the grocery store.
I use a butter knife to mix the coloring in. Then continue to add food coloring until you get the desired color intensity. *You can test the color on a paper plate or extra cookie dough.
Set up your station! I put out plenty of brushes, cookie sprinkles and cups of water. You can easily dip used brush into water and clean with paper towel and move to another color.

Refer to the printed photo while you paint.
NOTE ABOUT PAINT COLORS: you are pretty limited with the grocery store colors. They don’t mix well to create other colors so you are pretty much working with green, yellow, blue and red. I did create a black for outlining mixing blue/green/red. Remember that the egg yolk is already yellow, so when you add the yellow food coloring you get more of an orange. I am interested to try a bigger variety of food coloring.

I usually keep one paint color just the yolk with one drop of yellow to paint more neutral areas, like a face or background. Her I painted the face of the unicorn and added sprinkles.

I then did some basic outlining.


Outlining with a darker color helps to define the picture.

Use tweezers to add extras.


Here’s another example that shows the importance of outlining.
It is also helpful to go back over the colors dabbing extra paint on top.

Lift the parchment squares onto the cookie sheet and bake for 8 minutes for the perfect cookie!

Sugar Cookies
Ingredients
- 1 cup Crisco shortening
- 1 cup sugar
- 2 large eggs
- 1 ½ teaspoon vanilla
- 2 ½ cups flour
- 1 ½ teaspoon baking powder
- ½ teaspoon salt
Instructions
- Preheat oven to 350°.
- In mixing bowl, cream together shortening and sugar.
- Add eggs and vanilla. Whip until creamy.
- Stir in dry ingredients until well mixed.
- Refrigerate for 1 hour. (This will stop the cookie dough from spreading too much when cooking and will help keep it's shape better.)
- Roll out on floured surface to about ¼ inch thick. Cut out cookies and place onto cookie sheet with spatula. *Cookie sheet does not need to be sprayed. Can use parchment of sheet liner.
- Bake for 7-8 minutes. Allow to cool in pan for 5 minutes. Remove cookies to rack to cool before decorating.
How Your Ancestors Can Save Your Children
How much do your children know about you? Their aunts and uncles? Their grandparents? And beyond?
This knowledge (or lack of) may have more impact on their emotional well being than any other factor.
 Josef and Maria Schopf grew up in neighboring towns in Austria, but didn’t meet until they had both moved to America with their families.
Recent studies led by Dr. Marshall Duke have discovered a profound connection between a child’s family knowledge and their wellbeing.
“The more kids knew about their family’s history, the stronger their sense of control over their lives, the higher their self-esteem and the more successfully they believed their families functioned.” Dr. Marshall Duke
They determined this through creating a Do You Know Scale of 20 questions. They compared children’s responses to those questions with results from a battery of psychological tests and the results were overwhelming and astonishing.
***The “Do You Know?” scale turned out to be the best single indicator of children’s emotional health and happiness.***
“WE WERE BLOWN AWAY.” Dr. Duke said.
 Colleen Mott, my mother, and her sisters Pauline and Devota with their mother and grandmother. *Why didn’t Devota get a special dress?
HERE IS WHAT WE NEED TO DO:
“DEVELOP A STRONG FAMILY NARRATIVE”
“There was a lot of research at the time into the dissipation of the family. But we were more interested in what families could do to counteract those forces.” Dr. Marshall Duke, Psychologist, Emory University (Bruce Feller, The Stories That Bind Us, March 15, 2013)
1. Create in our children an “Intergenerational Self”. Dr. Marshall Duke
WE ARE PART OF A LARGER FAMILY.
Where did I come from? Where do I fit in? *Use the DYK Scale to help create the story.
Higher scores on the DYK scale were associated with:
- Higher levels of self-esteem and internal locus of control (a belief in one’s own capacity to control what happens to him or her).
- Better Family Functioning
- Lower levels of anxiety
- Fewer behavioral problems
- Better outcome for children with emotional/behavioral difficulties
2. Learn the good, the bad and the ugly. It should be an “oscillating narrative”, stories of success, failure and ultimately family “getting through”.
3. We can do hard things! Learning about ancestors who faced difficult challenges is empowering. It can lead to a worthwhile family discussion, “How should we face challenges together?”.
 Adrian and Twila with their first two children.
HOW TO CREATE A STRONG FAMILY NARRATIVE
*One important finding was that the information by itself is not sufficient. It has as much to do with HOW the receive the information as the information itself.”
They discovered that gaining this family information was much more valuable when coming from a family member, seeing and meeting older relatives, visiting family sites etc.
WHERE, HOW, WHAT and BY WHOM these stories are shared is vital.
WHERE?
*Family Dinner
*Road Trips
*Car Pools
*Bed Time
*Birthday Celebrations…..make a tradition of sharing birth stories
 Glenn Mott, my dad, hiking in the Great Northwest
HOW?
*Sharing stories
*Look at photo albums
*Visit and interview elderly relatives
*Visit places important to your family
 Saanya and her Grandmother
WHAT?
This is where we talk about the “OSCILLATING FAMILY NARRATIVE”.
Embrace the GOOD, the BAD, and THE UGLY.
Share the challenges as well as the happy times.
The bottom line should be: “No matter what happened we always stuck together as a family.”
BY WHOM?
Communication of family information across generations MATTERS.
*Start with Mom and Dad, Aunts and Uncles.
*Visit elderly relatives and ask them to share stories. Write them down! Record them sharing.
 Colleen Mott and her siblings…..and their car.
SOME THINGS TO TRY:
- Designate a Family Story Time.
- Create an Ancestor Wall. Collect and frame old photos. Take time to share stories about each photo.
- Collect and organize family photos.
- Create Family Traditions. THEY MATTER!
- Help plan a Family Reunion.
- Remember and celebrate deceased relative’s birthdays.
- Teach your children to keep a journal.
- Record your own history.
- Write a Family Mission Statement establishing your core values.
- Write your own DYK list.
- Visit family members and do an audio recording and interview them.
When family gets together have everyone grab a picture off the wall….share stories and information about them.

Palm Frond Reindeer
This became a family tradition when Corinne one at school when we lived in Florida. She was in second grade and it has hung on our wall every year since.
I was visiting another daughter in Vegas a couple of years ago and we gathered a couple bags full. We felt like we had come across a hidden treasure!
It’s a great craft for every age!
Here’s what you need.

1. Palm Tree frond. The only place I can find them to purchase online is at ETSY.
2. Googly Eyes ……add eyelashes if you wish!
3. Puff balls
4. Ribbon
5. Glue gun
And glue it altogether!
They each have their own personality!


How to Make Your Own Special Christmas Stockings!
- YOU CAN DO THIS! If you can run a sewing machine you can make your own stockings!


When my kids were little we weren’t that far past the time when we grabbed a sock from our drawer, and laid it on the couch for Santa to fill.
The only option at the store was the basic red fur stocking.
I wanted our stockings to be unique to each individual.
This was my first attempt.

I literally sewed those strips together and cross stitched the cuffs. I thought they were very cute at the time. It was the 90s.
A few years later I had a brain storm. I really wanted them to be unique to each kid’s personality. So I bought different fabric for each. I bought tassels and bells and made fur balls.

This is a terrible pic of some of the original stockings.
As the family grew I added more stockings. And EVOLVED.
I now make them LARGER. Also, I started hanging special ornaments on each.
So here it is. Step by step.
BASIC INSTRUCTIONS
- SHOP THE MATERIALS
Sometimes I start with a fabric…..sometimes I start with an ornament.

I often steer towards upholstery fabric because of the weight and design. BUT you can use any cotton or flannel. Just avoid anything stretchy.
Keep in mind that there are 3 components.
- The boot
- The cuff
- The sparkle (ornament, tassels, bells etc.)

Sometimes fabrics jump out at me, other times I have a harder time. I can be useful to go browse the notions and trims to see if anything there inspires me.
Lay out combinations together until you see what you want. It’s a piece of Christmas Magic when it all comes together.
MATERIALS LIST
1/2 yard fabric, any width
1/2 yard batting, 1/4 inch thick
1/2 yard lining (muslin, cotton or lining fabric all work well)
1/4 yard fur or cuff fabric
1 Christmas ornament, non breakable
1 1/2 yards cording or twine
2. MAKE PATTERN

Use any fabric to make pattern. I have used an old sheet before, also Warm and Natural batting. This is just a piece of lining fabric.
I just free hand the pattern…..I added the measurements to give you a basic template.
3. CUT OUT PIECES

Use pattern to cut out two pieces each of boot fabric, batting and lining.
4.SEW BOOT

Sew batting pieces to wrong side of stocking fabric, sewing close to edge.

Place two stocking pieces together, right sides in. Pin around edges.
Sew close to edges and trim after sewing. LEAVE TOP OPEN.

Trim edges.

Turn stocking right side out.
5.SEW LINING

Sew lining right sides together leaving top open. Leave 5-6 inch gap at bottom of boot, securing seam at openings. Sew close to edges.
6. ATTACH ORNAMENT


The ornament may come with long enough ribbon to attach and hang…..if not simply add a loop of ribbon or twine to attach. This will be hidden by the cuff or fur.

Hold up ornament with stocking before securing….as you can see it should hang in the lower center of the boot.
7. ATTACH FUR OR CUFF **Specialty cuffs at bottom of page
For a fur cuff, cut a piece 18 1/2 x 4 inches.
NOTE: When cutting long fur, spread apart and just cut the fabric, not the fur.


With longer fur, push to center on both sides before sewing together.
Fold together, right sides facing, sew side seam.

Match seam to side seam with ornament, pin and sew together.
8. SEW ON HANGING LOOP
Cut a 7 inch piece of cord or twine for loop. Pin on top of cuff above the ornament. Sew in place.


9. ATTACH LINING


Pull lining over top of stocking through opening in bottom of boot. Make sure the toe of the lining is pointing the same way as the boot.
Pin and sew around top of stocking.

Pull lining straight out from top of boot.

Make a fold along each side of opening and pin together.

Sew opening together.
Push lining into stocking, pull up cuff, and sew top of lining to the body of the boot.


AND THERE IT IS! You have a beautiful stocking!


SPECIALTIY CUFFS
You can do any combination of fabric and trims for the cuff.


How to Plan the Perfect Thanksgiving
Back in the 90’s when all 7 of my kids were home I reached Thanksgiving BURNOUT. We lived on a little farm outside of Dixon, Illinois and had no family nearby. We would often invite a few people to our Thanksgiving feast but it was mostly just us. So it entailed a massive amount of prep and cooking all for a 20-minute meal. And then there was the mess. It was not fun and I didn’t feel very thankful.

Twelve year old Max attacking a turkey leg.
So, I wrote out the menu with all our traditional sides and pies, and put it on the refrigerator. Each child was to choose one or two items to be in charge of (depending on age).

Three year old Theo helping with pumpkin pie.

17 year old Max helping Grandpa carve the Turkey.
A miracle happened. It became FUN! Did I still have a lot of work to do? Yes, but it was different. And the kids LOVED it. It became a cooking event, with lots of fun and laughter in the kitchen.
In recent years Corinne has created a Google doc that she sends out to everyone to sign up. She adds a loose schedule and anything else people need to know.
One of the sections now on the sign up is the schedule of activities. They vary from year to year. Things like Christmas ornament craft, Family Football Game, Mini hike or walk, Thanksgiving Trivia Game, Fruit Loop necklaces and puzzles have all made the list. It just depends on what people are willing to be in charge of, and prepare.

3 year old Sterling with his Fruit Loop Necklace.
Our family FAVORITE is BINGO! We play Bingo between dinner and pies. It is a mashup between Bingo and White Elephant.
Each guest/family brings a small pile of wrapped gifts. They are mostly Dollar Store and Target Dollar Spot stuff. Years ago I dug through old Christmas decorations, most of them were things I had crafted in the 1980’s and ’90’s. I wrapped them up, and my adult children fought over them hardcore. Now every few years they show back up during Bingo. It is so fun to watch them fight over their childhood Christmas decorations, and this way they get passed around every few years.

Stick on Mustaches were a FUN Bingo gift.
And now we have a Thanksgiving tradition that we love. We hope you enjoy it too!
Cindy
I was in High School when mom started this new tradition. I love that it has followed all of us into our own families. For many years I lived with my family in Portland far away from mine and my husbands families. We had many years of “Friendsgiving.” We missed our families, but we love the memories of spending Thanksgiving with friends.
I make a Google Doc and share it with anyone I’ve invited. I encourage them to add pies and dishes to the menu. I never “assign” people what to bring. I tell them to bring whatever will make the day special for them. I have found many new favorites by trying out our friends Thanksgiving favorites.

Then I print it for my fridge, and encourage my kids to sign up, and help make any of the dishes with my name on it. It always ends up with lots of messy handwriting and scribbles, but it’s not meant to be pretty.

Obviously, not all of my children are able to make a pie or stuff the acorn squash on their own. The point is that we are in the kitchen together. I call out to whoever is signed up for the next dish, and if it’s my 9 year old son he will need me to be right by his side, and he will mostly be helping me.
There are many reasons why this tradition is one of my favorites.
- Thanksgiving is about gathering and family. This promotes us spending more time together. The mom isn’t by herself doing all the prep.
- By the time kids are teenagers they can pretty much make these things on their own. How many 18 year olds can say they are confident in their pie making skills?
- It’s a great way to include the guests you have invited to your feast.
Corinne

Click below for our free PDF that you can edit with your own menu and sign up for your family! Thanksgiving_Menu_editable

How to Make a Beautiful Thanksgiving Table on a Budget

Thanksgiving Dinner is a BIG DEAL! It’s all about sharing our delicious traditional food with family and friends. So the table MATTERS. Paper plates and plastic ware just don’t cut it. But real china and linens COST.
This is what I do.
Gather the BASICS
1.Table cloth or covering
I find beautiful table linens at Thrift Stores all the time. Just throw them in the wash and run an iron over them and they can look as good as new.
Here’s the one I found recently for $7.99!!! (This is long enough for my 12 foot table!)

2.Napkins
Cloth napkins are THE BOMB and take your table to a whole new level. I bought these at TJ Maxx/Home Goods, a great place to search. Ross Dress for Less and Burlington are great too. It’s also worth searching online. I chose these because they are neutral and will work for Thanksgiving and Christmas. They come in sets of 12 for $10-$16.

3. Glassware
Dollar Tree Baby!!! They have beautiful, sturdy goblets at the wonderful price of $1/each. Can’t beat that!

4. Plates
Did you hear me say Dollar Tree??? Look at these, they are perfect.

5. Flatware
I buy sets when I see a good deal, generally at the same stores. TJ Maxx/Home Goods, Ross, Burlington etc. Target and Walmart are good too.
Here’s the thing. I don’t worry too much about mixing sets. Nobody notices and if they do they will think it’s charming.
6. Centerpiece
During the feast the FOOD will be the centerpiece. So prior to dinner, I just grab something decorative I already have. UNLESS you want set up a buffet separate from the table and leave the centerpiece throughout dinner. The point is, don’t spend money on something special. Do a combo of gourds, pine cones and leaves. A candelabra always looks great. Or one large pumpkin surrounded by pine cones. Add some autumn plaid ribbon.
Now PUT IT ALL TOGETHER!

For the napkins I fold in half and do a simple roll and tie with a piece of ribbon. Add a leaf for fun.
Other ideas:
Table runners are fabulous and will dress up any table in a quick minute. I find them at Ross, Homegoods etc. You cannot have too many table runners.

Here’s a round tablecloth that I found at the thrift shop recently. It would look great centered over the long tablecloth.

Here’s another great find from the thrift shop.

Crocheted placemats! They are beautiful and can be used many ways. Lined up like a table runner or under plates.
Here’s another idea:

Cover table with butcher paper and tape underneath. And get out the sharpies!

Set your table, using a runner and centerpiece…..leave markers laying around for everyone to share what they are thankful for.


It makes a beautiful table and easy clean up!

BTW. I found these chargers at the Dollar Tree.
THE KEY IS: Be Creative! Go with what you find and have fun with it!
HAPPY THANKSGIVING!